Noticias

Front-End Refresh: How to Knock Out a DIY Grille Replacement in 30 Minutes
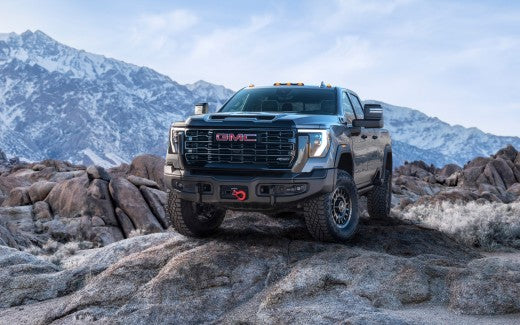
Nothing dates a modern vehicle faster than a faded, rock-chipped or cracked factory front grille. Whether you are dealing with cosmetic battle scars from highway driving or you simply want to swap out a dull chrome piece for a sleek matte-black upgrade, a grille replacement is one of the most satisfying weekend projects you can tackle. Even better? You do not need a garage full of specialized tools or an entire afternoon to get it done. Why Upgrade Your Grille? Your vehicle's grille is more than just a cosmetic accent. It serves a crucial aerodynamic and functional purpose by channeling airflow directly into the radiator and cooling assembly. Over time, road debris, salt and UV exposure turn a once-proud front end into an eyesore. Swapping it out instantly restores your vehicle's curb appeal. For truck and SUV owners, upgrading to a higher-trim factory style or a modern blackout aesthetic is a cost-effective way to make an older vehicle look brand new again. Tools You Need for the Job Before you pop the hood, gather these basic household tools to ensure a smooth, scratch-free installation: Trim Removal Tool: Essential for popping plastic push-pins without snapping them. Socket Set: A standard ratchet with metric sockets (usually 8mm or 10mm) for factory bolts. Phillips and Flathead Screwdrivers: For secondary fasteners and stubborn clips. Microfiber Towel & Painter’s Tape: To protect your painted bumper fascia from accidental tool slips. Step-by-Step DIY Grille Replacement Guide Most modern late-model vehicles use a combination of top-edge bolts and hidden plastic clips. Follow this streamlined workflow to complete the swap in under 30 minutes: 1. Prep and Protect Park on a flat surface, engage the parking brake and pop the hood. Apply strips of painter’s tape along the painted bumper edges directly beneath and around the grille to prevent accidental scratches while removing the old assembly. 2. Remove the Upper Fasteners Look along the top header panel where the grille meets the radiator support. Remove any plastic push-pins using your trim tool, followed by any factory bolts. Keep these fasteners organized in a cup, you will likely reuse them. 3. Release the Hidden Clips This is the trickiest part. Most grilles are secured by pressure-fit plastic tabs along the bottom and sides. Gently pull the top edge of the grille toward you while reaching behind (or using a trim tool) to depress the locking tabs one by one. Avoid yanking aggressively, which can crack the surrounding bumper plastic. 4. Align and Secure the New Grille Take your replacement grille and line up the alignment pins with the factory mounting slots. Push firmly inward until you hear a series of crisp "clicks" indicating the clips have seated. Reinstall your top bolts and push-pins to lock everything into place. Source the Right Fit Without the Guesswork When buying replacement body panels or grilles, skipping the cheap, ill-fitting aftermarket knockoffs saves you hours of installation frustration. Instead, look for certified recycled OEM components or direct-fit modular parts matched to your exact VIN and serial number. Shopping through a transparent catalog ensures factory-grade alignment, zero fabrication headaches and lightning-fast shipping straight to your door. A fresh front end completely transforms your vehicle's attitude, making it look well-maintained and sharp. With the right tools and a verified-fit part, you can upgrade your look during your lunch break. Ready to give your front end a serious upgrade? Explore our transparent inventory of exact-fit grilles, complete with high-resolution photos, VIN matching and rapid shipping today.
Leer másNoticias